Note: The word “Grateful” is a Christmas card that my good friend Cary at ZFactory made. Feel free to check out his other card designs here: ZFactory Christmas cards.
This cake is so big, it took a poll on my Facebook page to come up with a name!
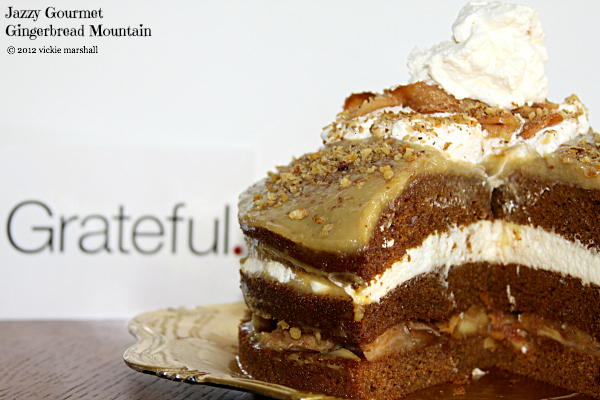
It’s gingerbread layer cake, with buttery sliced apples, a light cream cheese filling and a rich custard topping. It’s gingerbread overload. It’s gingerbread gone crazy .
It’s Gingerbread Mountain.
I knew I wanted the cake to be 3 layers, but I only own 2 cake pans. Since I didn’t want to go out and buy another cake pan, and assuming that other people would only have 2 cake pans, I set out to make 3 layers out of 2 pans. Finally, I came up with the scheme to put 1/3 of the batter into one pan, and 2/3 in the remaining pan. Then I knew they wouldn’t bake at the same rate, so I removed the first pan after 20 minutes. Worked like a charm. I figured I could cut the larger layer in half horizontally; although, I didn’t have much experience in slicing cakes in half. What do ya know–worked like a charm also.
So how did it taste? I wasn’t sure. And I broke a cardinal rule. I served it at a church potluck the next day. Yep, the good folks of Southside Christian Church were going to be my guinea pigs, without my having tasted it first! Well, it’s not like I could whack out a slab and taste it. That would ruin the presentation! On the other hand, I couldn’t serve anything that tasted like crap.
So this is where we come to the good news/bad news. Which do you want first?
Good news: the cake tasted great! And it held up strong like a steel tower as people cut slices from it.
Bad news? I never got a picture of it; but I figured that was no problem, because I had planned to make another one for Thanksgiving. A few days later, I made the 2nd cake and the custard layer did not set properly. I stuck the cake in the freezer so that the custard would set faster, and when I checked on it later, the layers had slid all over inside the freezer! I figured out that I didn’t mix the gelatin properly and that’s why the custard didn’t thicken as it should. Needless to say, Cake #2 ended up being a gingerbread trifle instead of a cake!
Cake #3–I mixed the gelatin more thoroughly and layered the apples on the bottom to make it more sturdy. Success!
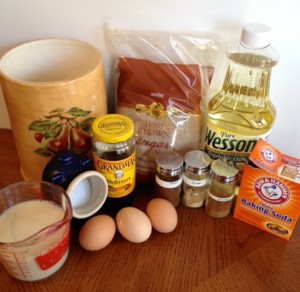
- 3 cups all-purpose flour
- 1½ teaspoons baking soda
- ¼ teaspoon salt
- 2 teaspoons cinnamon
- 1½ teaspoons ground ginger
- ⅛ teaspoon ground clove
- ¾ cup vegetable oil
- ¾ cup firmly packed light brown sugar
- 3 eggs
- ¾ cup molasses
- 1½ cup milk
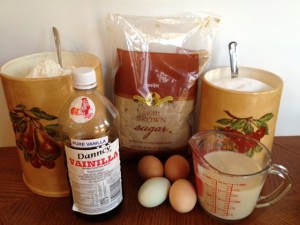
- 4 egg yolks (well beaten)
- 2 heaping tablespoons flour
- ½ cup granulated sugar
- ½ cup firmly packed light brown sugar
- 2 cups milk, divided
- 1 teaspoon vanilla
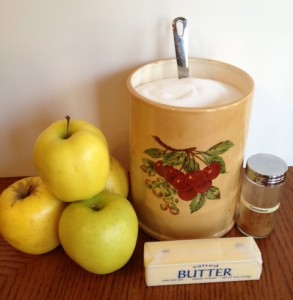
- 3 tablespoons butter
- 4 apples, peeled and thinly sliced
- ¾ teaspoon cinnamon
- ¼ cup, plus 2 tablespoons sugar
- For the cake, preheat oven to 350˚F. Grease and flour 2 (9-inch) cake pans (I use cooking spray that includes flour). Whisk together flour, soda, salt, cinnamon, ginger and clove in a medium bowl. In a large bowl, whisk together oil, brown sugar, eggs and molasses. Add the dry ingredients and milk, alternately, beginning and ending with the dry ingredients. Do not over mix. Measure 1½ cups of the batter and pour into one cake pan. Pour the remaining batter into the other pan. Bake at 350˚F for 20 minutes. Remove the smaller layer from the oven. Bake remaining layer for another 25-30 minutes. OR, if you have 3 cake pans, put ⅓ of the batter into each pan and bake 15-20 minutes, or until a toothpick inserted in the cake comes out clean. Cool all layers on a wire rack in the pans.
- For the custard, make a paste of the egg yolks, flour, sugars and small amount of the milk in a heavy medium saucepan. In a microwave-safe bowl, heat remaining milk 1 minute. Slowly add milk to the egg mixture and, stirring constantly, cook over medium low heat 7-10 minutes or until thickened (mixture will thicken more as it cools). Remove from heat and stir in vanilla. Pour custard into a medium bowl, then press plastic wrap onto the surface to eliminate a skin. Refrigerate about 30 minutes.
- Melt butter in a large skillet till foamy (but not brown). Add apple slices, cinnamon and sugar. Cook apples a few minutes until softened, stirring occasionally. Set aside to cool.
- Soften the gelatin in the water for about 5 minutes in a microwave-safe dish. In a medium chilled bowl, whip cream until stiff peaks form. (If you want some tips on whipping cream, watch my episode of How to Make Fresh Whipped Cream.) In a small bowl, cream together cream cheese and 1¼ cups powdered sugar. Microwave gelatin until it dissolves and starts to bubble around the edges, around 30 seconds. Stir ½ of the dissolved gelatin into the cream cheese mixture and combine well. Stir the other ½ of the gelatin into the custard and combine well. Make sure you integrate the gelatin thoroughly or you will have chunks of gelatin in your fillings! Fold ½ of the whipped cream into the cream cheese mixture. Sweeten the other ½ with remaining teaspoon powdered sugar and save for garnish. Put both fillings back into the fridge for another 30-60 minutes.
- To assemble, place the smaller layer of cake on a cake plate. Place the apples over the cake, reserving a few for garnish. Cut the larger layer in half horizontally. Place the bottom half of the cake layer on top of the apples. Spread cream cheese filling over 2nd cake layer. Place remaining cake layer on top. If the cake domed a lot while baking, trim off the dome to make it flatter. Spread custard over the top cake layer. If any of the fillings are still not set, stick the cake into the freezer for 15 minutes. Cover and refrigerate for a few hours or overnight. Top with apples, walnuts and whipped cream garnish. Refrigerate any leftover cake.
Watch video here:
Can’t see video? Watch it here: Gingerbread Mountain
Linked to these fabulous parties.
Join Sherry K – Jazzy Gourmet on Facebook, Pinterest, Twitter
Mom always said it is nice to share!
















I am glad to find your blog via Foodtastic Friday.I enjoyed watching this video.& Gingerbread Mountain looks fabulous!Thanks for the recipe & instructions…
Have a Great day!
http://foodssrilanka.blogspot.com/
Wow, this had like my most favorite things all in one! I could die inside this cake 😀
I think this a ski slope at Santa Land… gorgeous. I hope you are bringing this dessert by foodie friday today.
Ha, perhaps that’s what I should have called it! Anyhoo, it’s already up on Foodie Friday. Thanks for hosting every week!
This looks amazing. I just pinned it. I have a link party called Wednesdays Adorned From Above Blog Hop and would love to have you share this with everyone. Here is the link to the party.
http://www.adornedfromabove.com/2012/11/washi-tape-idea-book-and-wednesdays.html
Debi @ Adorned From Above
Lots of great flavors. Unique approach to solving your pan issue. I am hosting a great giveaway on Dining With Debbie. (1) $50 gift certificate to my favorite jeweler robinsonlane.com and (2) a signed copy of Arkansas Pie: A Slice of the Natural State written by fellow blogger, Kat Robinson. I would love for you to come enter Merry Merry Munchies and the rafflecopter entry. I think you would enjoy either one of these prizes. http://diningwithdebbie.blogspot.com/2012/11/2012-merry-merry-munchies-3-baked.html
It’s a fantastic cake, and it looks rich and scrumptious
I think it’s unique 🙂
This looks and sound yummy. Thanks for such a comprehensive post.
Holy smokes! This cake has it all! Awesome!
Oh that looks super yummy!
I love gingerbread!
Wow-I’ve never seen anything like this before!! It looks so gorgeous and delicious. Thanks so much for the recipe!
great flavor combos thanks for sharing at Foodie Friends Friday!
What a lovely cake! I would have happily been a taste tester for you haha!
Thanks for sharing on Sweet Saturday (I was the co-host this week).
Tammy
ourneckofthewoods.net
Hi there! I stopped by through the Tutus and Tea parties Pinterest Linky. I pinned your post on my Food board. Here’s the link I’d like to be pinned : http://ellecrafts.blogspot.fr/2012/11/ma-belladone-by-deer-and-doe.html
Thank you from Paris 😉
Bisous, Sparkle
http://ellecrafts.blogspot.com
Oh Sherry, Your gingerbread mountain has me seriously salivating. I’m ‘this’ close to licking the screen! So indulgent and divine. I’d love a huge slice, right about now. )
If you don’t mind, I’d love if you would stop by and share these and any other dessert creations on Sugar & Slice Sunday weekly link party.
Thanks Lisa, I just linked up and also became a fan of yours on FB!
Oh my! I am a gingerbread nut! Love this! Thanks for sharing at Church Supper. Have a blessed week & come back soon !
This looks amazing. I am going to pin this to my Christmas Baking. Thanks for sharing. Cheers
I can’t…it’s too much! You need to stop with these delicious cakes, it’s too much!!!!
Just kidding…keep them coming! Thanks for sharing at Sweet Saturday 🙂
Thanks Jessica, you are too funny! And yes, I will keep coming, ha!
Your cake looks fabulously delicious!
Looks and sounds incredible!
Hey from tessacotton! Love your creation, they look crazy delicious. I would be so thrilled if you would link up to my new, Christmas themed linky party!
http://tessacotton.blogspot.com/2012/12/christmas-linky-party.html
Thanks, Tessa, I just linked up to your party. Thanks for the invite!
Wow! What a great recipe! Thanks for sharing at my Twirl & Take a Bow party at House on the Way! Have a great week!
Leslie
Pinned this – I definitely need to give this a try! Thank you for sharing at All my Bloggy Friends this week 🙂
Holy Toledo!! This looks DELICIOUS!!! I’m so happy you linked up with Mop It Up Mondays yesterday. You’re being featured on The Tuesday Ten: http://www.ishouldbemoppingthefloor.com/2012/12/the-tuesday-ten.html
Thanks bunches!
{HUGS},
kristi
Thanks Kristi, I am thrilled!
Holy moly! This looks amazing! Thank you for taking the time to link up to Whimsy Wednesday! We LOVE your company☺
Kelly at Smart! School {House}
http://www.smartschoolhouse.com
I think this cake is stunning! I can practically taste it! I like that your second cake became a trifle! Very resourceful!
This looks fantastic! Gingerbread is one of my favorites – but this takes it to a new level! I’d love for you to share this at Tuesday’s Table for the Holidays – http://zentmrs.blogspot.com/2012/12/tuesdays-table-countdown-to-christmas.html!
Thanks for the invite–I just linked up!
Oh this looks delish!
Thanks for sharing at the Adorned From Above Blog Hop.
Adorned From Above,
Debi.
The Busy Bee’s,
Myrna and Joye.
Oh, this cake looks so delicious! Thank you so much for sharing again this week at A Bouquet of Talent. Have a wonderful weekend. 🙂
Oh my goodness, what a decadent, delicious, mouthwatering master piece!
Thank you so much for sharing this at Wednesday Extravaganza – Hope to see you there again next week with more deliciousness 🙂
Sherry, this cake looks amazing! I got a laugh that the layers slid over in the freezer, because that’s totally something that would happen to me! I’m so glad you shared it with us on Wicked Good Wednesdays and look forward to seeing what you’ll bring this week!
Good Morning Sherry,
Oh my, this is a mountain indeed. I can hardly wait to try this awesome recipe. Hope you have a great week and thank you so much for sharing with Full Plate Thursday.
Come Back Soon!
Miz Helen
I have been drooling over this cake for a week. I wish I lived with you. Thanks so much for sharing at Wednesday’s Adorned From Above Blog Hop.
http://www.adornedfromabove.com/2012/12/7-recipes-and-wednesdays-adorned-from.html
Debi @ Adorned From Above
Joye and Myrna @ The Busy Bee’s
Linda @ With A Blast
Sherry,
This cake is gorgeous! I love the name you ended up with too. I can’t wait to try this recipe. I love gingerbread. Thanks for sharing at Creative Thursday 🙂 Have a great week.
Michelle
Looks amazingly delicious, Sherry!! Thanks for linking up to Tasty Thursdays at The Mandatory Mooch. Can’t wait to see what you link up this week. Thanks, Nichi
This looks delicious!!!!
featuring this tomorrow on Serenity Saturday
Can’t wait to see what you have to share tomorrow
oh my that looks wonderful! yummy and pretty!
Just a wanted to let you know our Silhouette Cameo Giveaway ends tonight, if you haven’t entered yet (or if you wanna get more entries! 🙂 Have a great weekend!
http://www.oneprojectcloser.com/giveaway-and-the-humble-brag-link-party-11/
This looks beautiful! Featuring you from Scrumptious Sunday #40! http://iamaddictedtorecipes.blogspot.com/2012/12/scrumptious-sunday-40-and-41-features.html
Thanks so much! I really appreciate it. Merry Christmas!
Saw this on Foodie Friends Friday and had to check it out, looks amazing!!! YUM!
Lori
Who Needs A Cape?
Not Your Average Super Moms!
Yum…you always have such original flavor combinations!! I love how resourceful you are Sherry. 🙂
I love your gingerbread and your great video!!
Thanks for linking up.
Diane Roark
http://www.recipesforourdailybread.com
Wow, this one looks amazing too! I love your ideas!